*This post is going to be a bit more technical so for everyone who is more into the pretty pictures please skip to the end of the post.* Anyways, for everyone who will not be bored to death by the topic it could actually be quite useful because I had to do a bit of research (and practice) on it myself.
First of all, steeking isn't as scary and difficult as it may sound, it's simply the process of cutting your precious knitting that you have worked on for weeks or months open with scissors to insert the sleeves or button band. I have definitely discovered its value especially for Icelandic and fair-isle patterns because you can just knit the whole garment in rounds: one big tube for the bodice and two smaller tubes for the sleeves. That means you only knit and almost no purl is involved which makes working with different colours easier and makes your stockinette stitch look more regular (and it goes faster!).
I started off with one of my Icelandic cardigans, the "Aftur" pattern, as it was originally designed as a jumper but I preferred an open cardigan. I decided to put three extra purl stitches at the centre of the garment when knitting the "bodice tube" so that I would know where to cut later and this definitely helps. You don't have to put three stitches, one can also be enough but it might make you feel safer if you use the method for the first time. As the Icelandic yarn (Létt lopi in my case) is "sticky" enough a crocheted steek would theoretically work fine (see a useful youtube tutorial
here). This technique is also used for fair-isle steeks because the wool yarn has the tendency to fray less because it is less slippery than for example merino, cotton or silk yarns. However, I chose to reinforce the steek with a sewing machine seam anyways because I was too scared to mess up my cardigan and I wanted to be on the safe side.
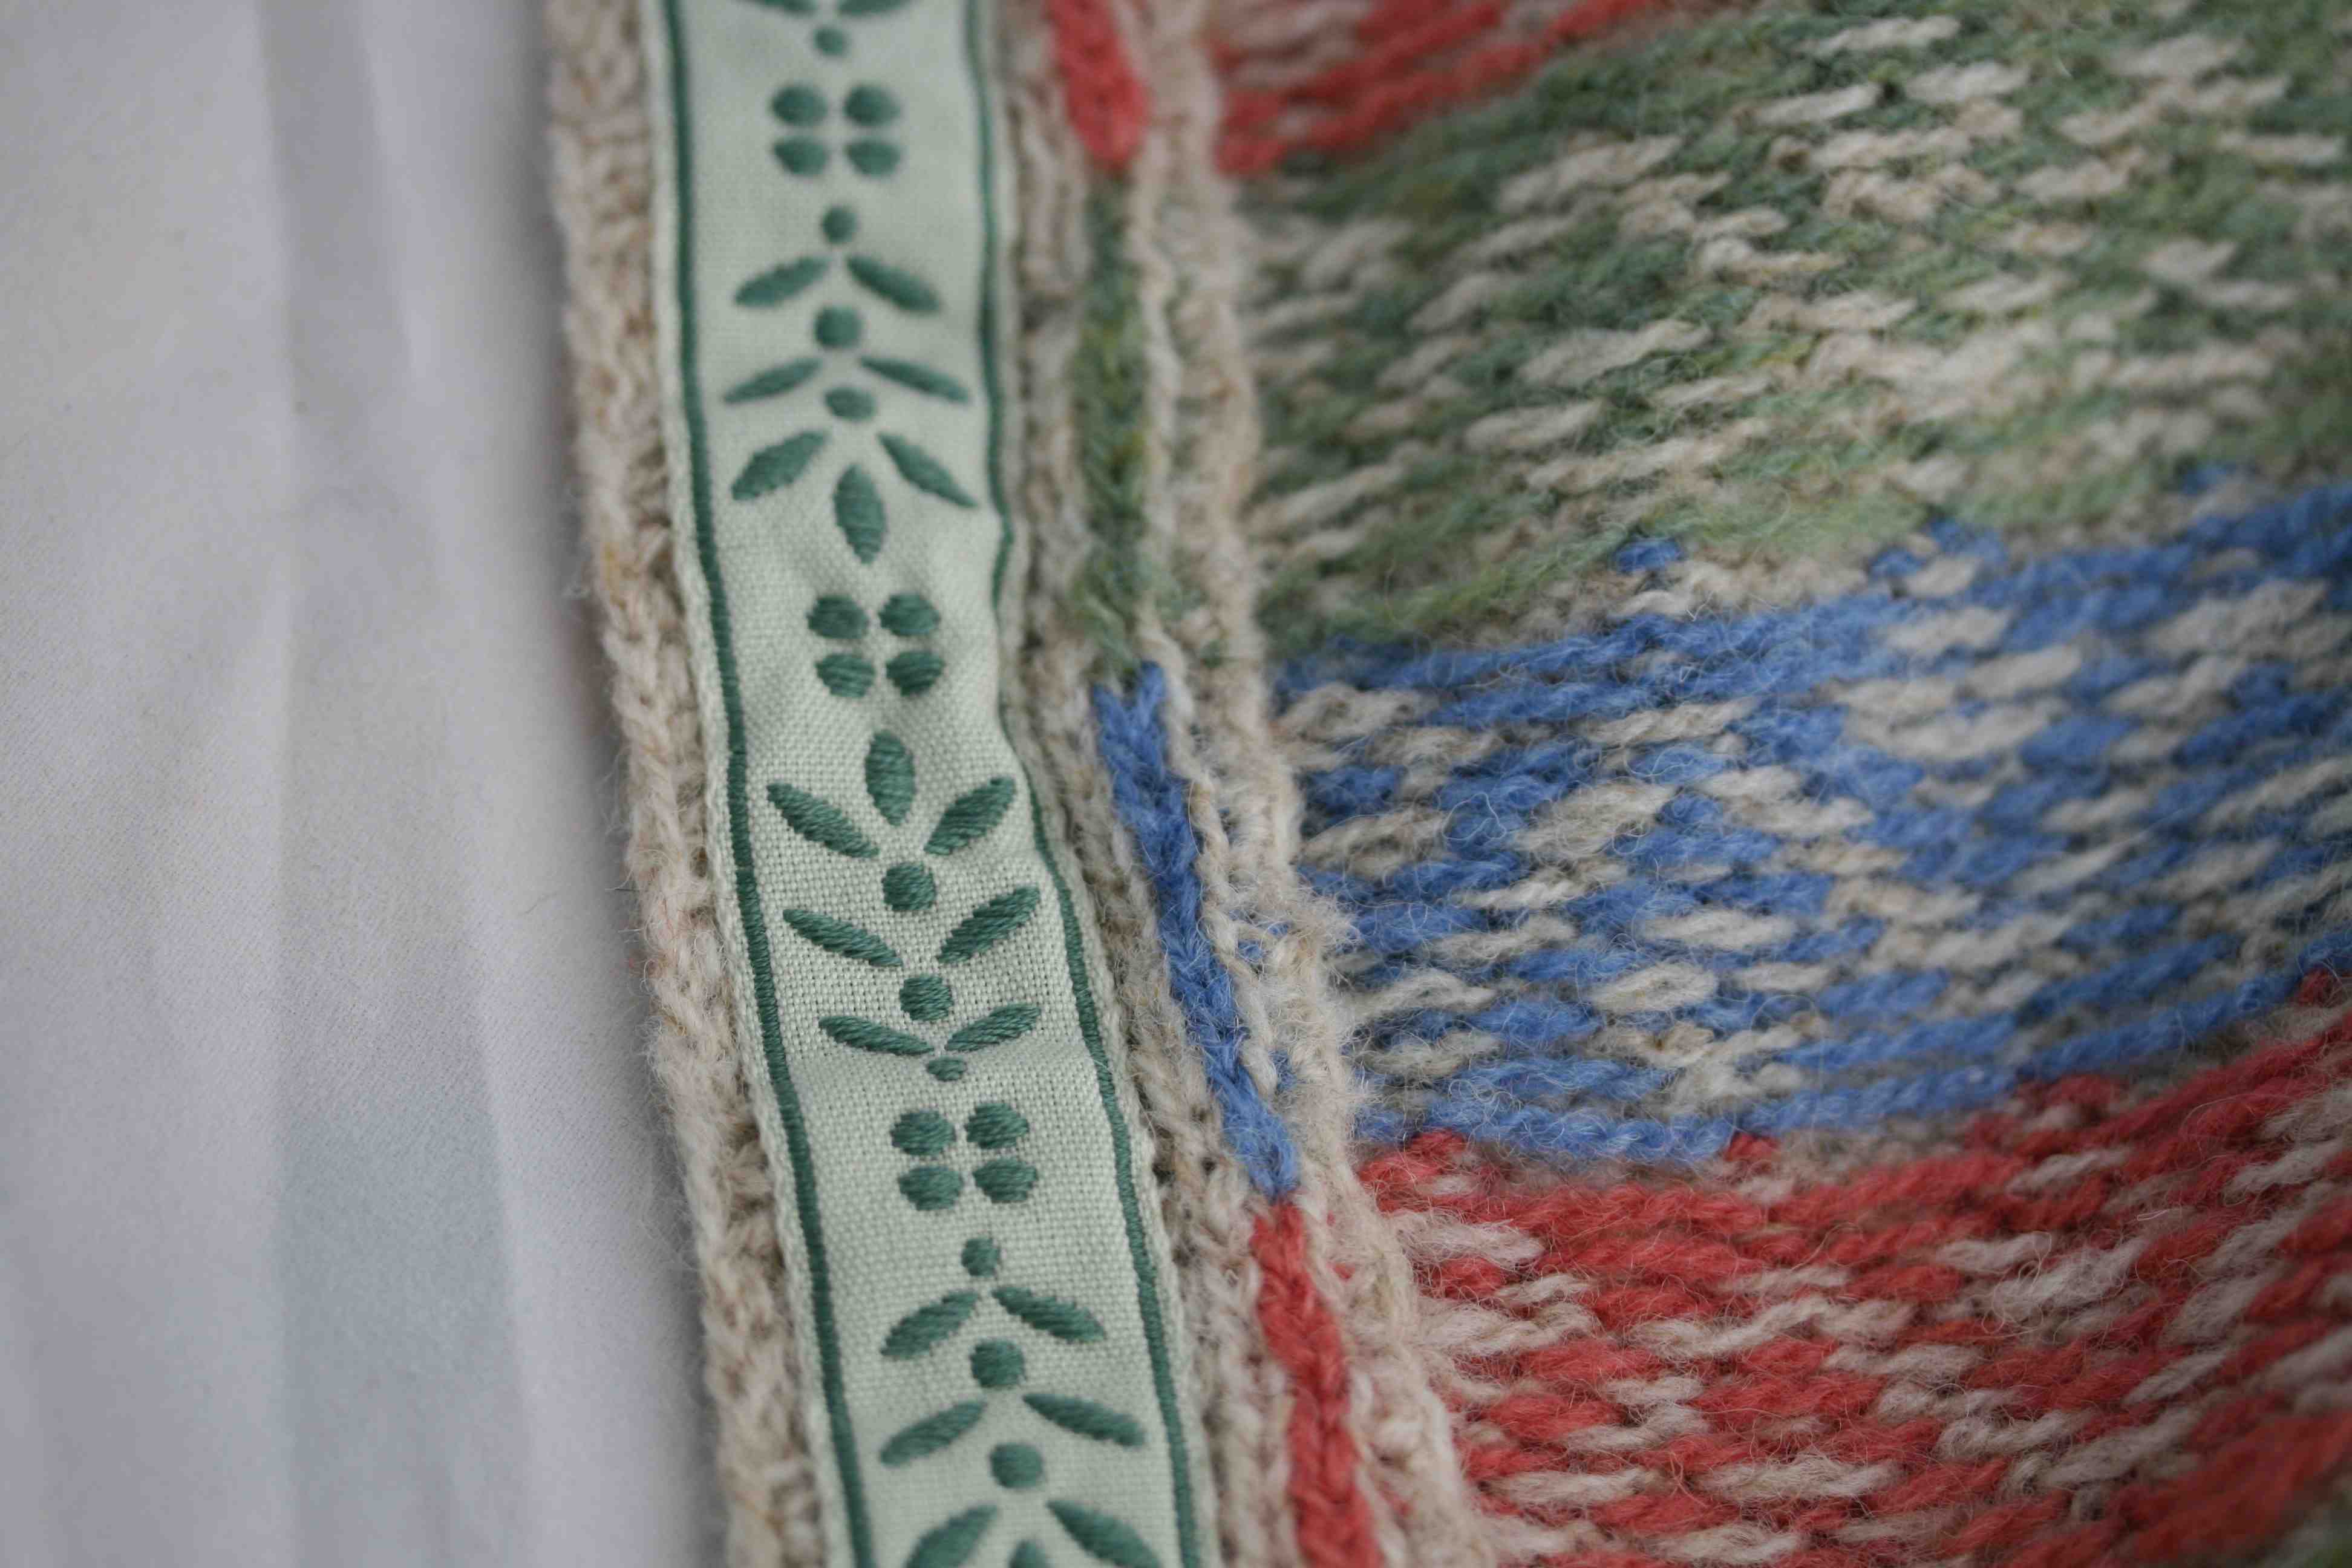
Once you have secured the steek with a seam at both sides, either crocheted or with a sewing machine, you just cut it open. The ends will still fray a bit but you can pick out the loose ends and clean it up a little. I also chose to give the open seams a bit of a tidier look by crocheting over the seam. Alternatively you can sew a ribbon over it as a type of bias facing it is done sometimes in Norwegian or fair-isle cardigans. Kate Davies has for example done this on her "
Ursula" cardigan. This might be difficult for Icelandic cardigans because the yarn is considerably thicker and it would make for a very bulky seam so I'm not sure if it is recommended. I like it because it looks very neat and tidy.
I found a very useful post on Norwegian steeks, which are a bit different, on
Eunny Jang's blog which explains it quite well. In contrast to the Icelandic/ fair-isle steek mentioned above it has to be done with the sewing machine; a crocheted steek will probably not be enough to reinforce the garment edge. I came across this post because I want to start a Norwegian jumper soon but the original pattern I found didn't explain the steeking very well (how, when and where??).
Knitty is also a good source of information on this topic. Another difference is that the Norwegian technique is used not only for cardigans but also for the sleeves and the neck which is new to me. I will put this technique to a test soon so keep your eyes open on this blog. It seems interesting because it also uses a steek for the sleeves and does not insert the sleeves by picking up stitches as you do with yoked sweaters but the sleeves are just sewn in onto the bodice, giving them more of a hanging style (I forgot what the exact word was to describe it but the shape comes out a bit more boxy than in a yoked sweater knitted in the round).


No comments:
Post a Comment